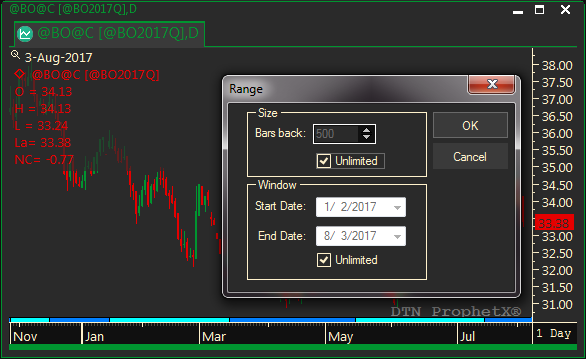
X-Axis Change (Date) Range
When creating a chart, the data will fill the screen. As you move backward in time the quote server will continue populating the chart until all the data has been retrieved. We call this History on Demand.
Sometimes, you don’t want to retrieve all this information and maybe only want, for example, 6 months of data.
To set a range of data:
- Right click on the x-axis
- Select Change Range
- Select the size of the data set (# of bars to display) or enter the start and end date
- (Unlimited will give you the entire data set – use this to retrieve all the chart data again after you’ve selected a specific range)
Tip: The start date is the date in history where you want to start retrieving – the end date is today’s date or the most recent date in the data set range.
X-Axis General Tab
To Change the Date/Time Display on a Chart
- Right-click on the X-axis and select X-Axis Properties.
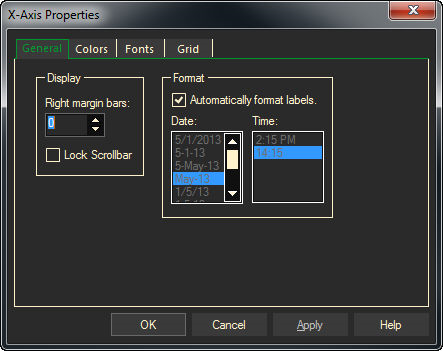
- Right margin bars: allows the charts right-side margin to be increased so that future dates are visible. Trend lines can be extended into this area. Allowable range is from 0 – 50.
- Lock Scrollbar: locks a scrollbar into place that can be used to scroll the chart back/forward.
- Automatically format labels: when checked, the date labels will be formatted automatically. If not checked, select the desired format with the Date and Time selections.
At any time, select Apply to save and view changes while the dialog remains open.
X-Axis Colors Tab
To Change Background, Text and Grid Color
- Right-click on x-axis text and select X-Axis Properties.
- Under the Colors tab, select the item and then color.
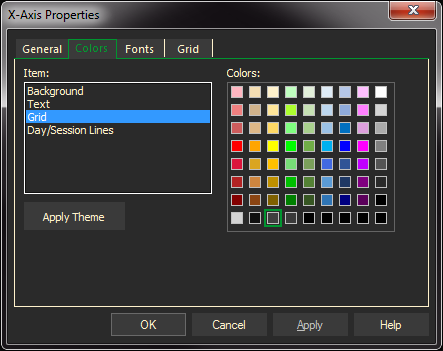
At any time, select Apply to save and view changes while the dialog remains open.
To exit, do either of the following:
- Select OK to apply changes and exit.
- Select Cancel to discard changes. Only changes made before clicking Apply will remain.
X-Axis Fonts Tab
- Right-click on x-axis text and select X-AXIS Properties.
- In the Properties dialog, under the Fonts tab, make selections for font, font style, size and effects.
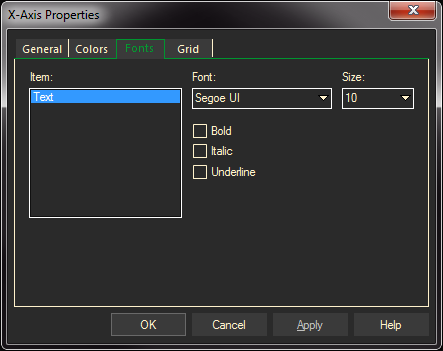
- Click OK to exit the Properties dialog.
- In the Properties dialog, do any of the following:
Select Apply to save and view changes while the dialog remains open.
Select OK to apply changes and exit.
Select Cancel to discard changes. Only changes made before clicking Apply will remain.