Download and Install DTN ProphetX
You can download DTN ProphetX from this link. To install, run the downloaded application and follow the on-screen prompts.
DTN ProphetX Update Process
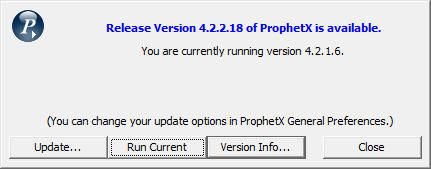
After you have been running DTN ProphetX and a new version is released, the following dialog will open when you start DTN ProphetX:

From this dialog, the following options are available:
- Update: downloads the latest version of DTN ProphetX, installs it, then runs it.
- Run Current: run your current version without downloading/installing the latest update.
- Version Info: displays information on the new version’s features and enhancements.
- Close: stop the process entirely.
Advanced Installation Features
The default installation folder location for DTN ProphetX is:
C:\Users\%USERNAME%\AppData\Local\Programs\DTN\ProphetX.
If you want to install DTN ProphetX to a different folder, you must start the installation program with the following command line prompt: /pathdlg=1.
For example, open a CMD line prompt and enter: ProphetX-VERSION_NUMBER.exe /pathdlg=1
The installation program will run and a new option to select the folder to install DTN ProphetX will be available
- Replace “%USERNAME%” with your PC’s User Name.
- Replace “VERSION_NUMBER” with the current version of DTN ProphetX you are installing.