Exporting a Chart that will update automatically can be accomplished in a few easy steps.
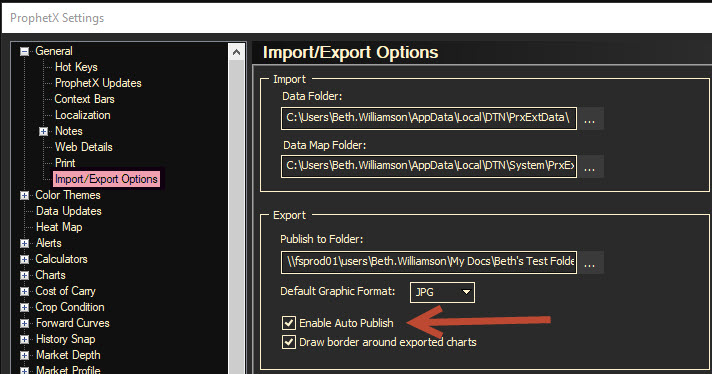
- Go into your ProphetX Settings.
- Under GENERAL, select Publish/Export Options.
- Make sure the Enable Auto Publish box is checked. The default destination where the chart is saved can be set here.

- Create Chart in ProphetX and save in workbook.
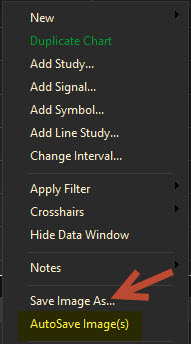
- Right Mouse click on Chart and make sure the Auto Save Images is check marked.
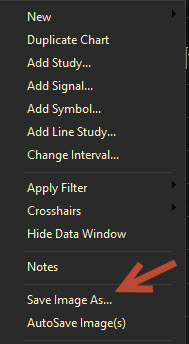
- Save Chart using the Save Image As. The default location set in the ProphetX settings will be what comes up, but the chart can be saved anywhere.
- NOTE* the JPG and BMP can be blurry, especially with black background charts. Saving as a PNG or one of the other available formats will improve clarity.

- Open Document you want the chart in.
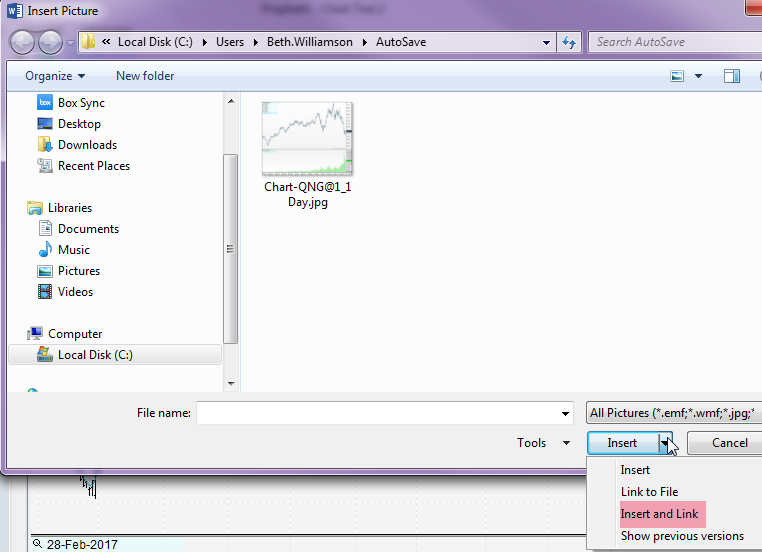
- Insert a Picture and find the location the chart is saved.
- Using the drop down box, Insert and Link the chart into the document.
- Save document.

- To update changes to the Chart, Right Mouse click on Chart and select Update Image.
- You may need to close and open the saved document to see changes.
