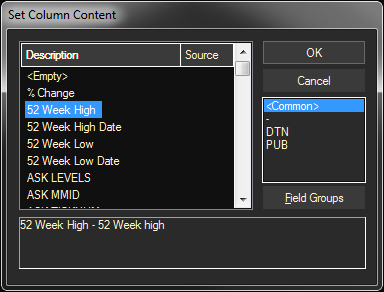
Field definitions are displayed at the bottom of the dialog box when a field name is selected.
To Add or Replace a Column
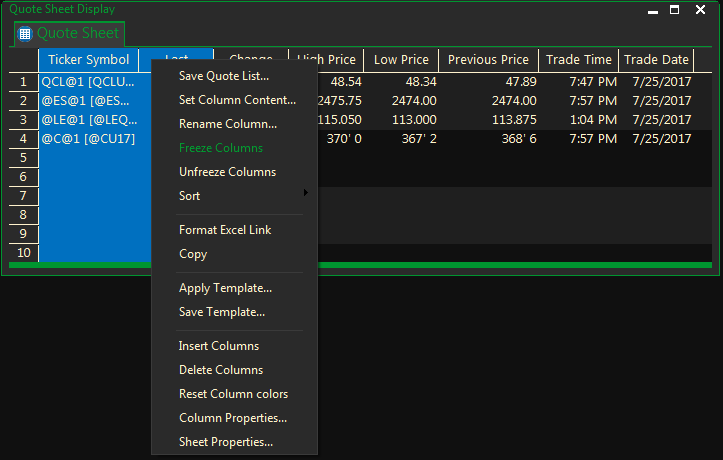
- To replace a column, right-click on the column heading and select SET COLUMN CONTENT.
- When inserting a column the click on the column to the immediate right. The column will be inserted to the left of this one.
- Select Insert Column
Select a Group
- On the right side of the Set Column Content dialog is a list of column sets, called field groups
- Select the <Common> group, a vendor-specific group, or a group that you have created. Columns included in that field group will be displayed to the left of it.
- Double-click on the desired column description.

Field definitions are displayed at the bottom of the dialog box when a filed name is selected.
To Create Your own Field Group or Customize Column Names
Make column headings your use often easy to find by putting them in a separate group. When you create your own group, you can also rename the individual column headings as you like.
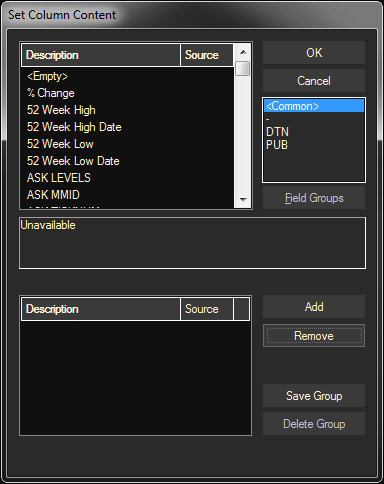
- Click the Field Groups button to expand the Set Column Content dialog.
- Select a column description and click the Add button to add it to your new field group.
You can also mix column descriptions from existing field groups — just click on the group name to display column descriptions in it. Select a group and click Add. - Repeat until you have created the list you want.
- To remove a column from your new list, select it and click the Remove button.
- To rename a column on your new list, use the same procedure you use to rename files in your Files docked pane window and other file access windows:

- Click on the column name, pause, and then click the column name.
- Type the desired name in the text box that appears.
- Click outside the text box or press your Enter key.
- Click the Save Group button and enter a name for your new field group.
Field groups that you create are placed in alphabetical order in the field group list, with a hyphen before the name.
To use the field groups:
- In your quote sheet, right click on the column where you want to insert the group
- Select Insert Column
- Go to the “Common” field selection on the right side of the dialog
- Click to select your field group – the fields in the group with display on the left
- Select 1 or all of the fields. You can use the Ctrl or Shift key to select multiple fields
- Click on the OK button. The selected fields will be added to your quote sheet.
To Divide a Quote Window
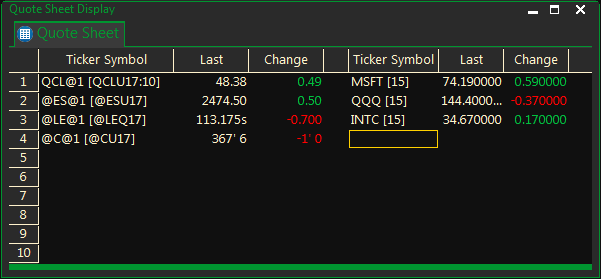
Creating a split quote sheet with the same field names, divided by a blank column is the perfect place to use the field groups.
To create a split quote sheet as shown below, follow the instructions above and add the entire group in the first blank column to the right of the existing columns.

To Add a Blank Column
When Adding field groups, you might want to put a blank column between them to separate the groups.
- Right-click on column, select Insert Column.
- Select <Empty> from the description field and click the OK button.
To Delete a Quote Sheet Column
Right-click on the heading of the column you want to delete and select DELETE COLUMN.
To Change Column Width
- Just drag the border between two column headings to the left or right. You can also select multiple contiguous columns and then drag the border for one of them. All will conform to the new size.
- To save the characteristics of your customized quote window for use with future quote windows, save the sheet as a template.
To Freeze or Unfreeze a Quote Sheet Column
When you freeze columns, you select specific columns that remain visible when scrolling in a Quote Sheet.
- Right-click on the Ticker Symbol column and any adjacent columns and select Freeze Columns.
- If the columns are frozen, right-click and select Unfreeze Columns.

Cell, Column, Row, and Sheet Property Precedence
The Quote Window properties precedence is the following: Cell, Column, Row, and Sheet.
For example, if the Cell Properties are changed first, and then the Sheet Properties are changed, the Cell Properties will have precedence and will not change.
In another example, if the Column Properties are changed, then the Row Properties, the column properties will still have precedence.
Tip: Changing the properties on individual pages will over-ride selections in the Preferences.